Table of Contents
- Overview
- Setting up key-based authentication
- Disable the IPv6 access
- Disable root login via SSH
- Set up a firewall
- Setting up Fail2Ban
Overview
This guide covers important aspects of hardening SSH access for your production server so you can secure your resources against random brute-force login attempts.
We’ll be mainly covering these topics:
- Use key-based authentication if you’re still using passwords
- Disable SSH access over IPv6
- Disable root login via SSH
- Disable password-based authentication once you can connect with your keys
- Set up a firewall
- Using Fail2Ban to ban IP addresses after too many login attempts
Let’s get started!
Setting up key-based authentication
If you’re using a password to authenticate into your production server, we highly recommend using SSH keys which are more secure and convenient for managing servers. Follow the steps in this guide and you should be good to go: How to setup SSH keys on your Linux server
Disable the IPv6 access
IPv6 is a newer protocol compared to IPv4, but for most users out there, it’s likely they won’t be needing it presently. For enhancing security, we’ll disable SSH access over IPv6.
Connect to your instance with a less privileged user you’ve set up previously. Do not proceed if you just have the root user’s credentials.
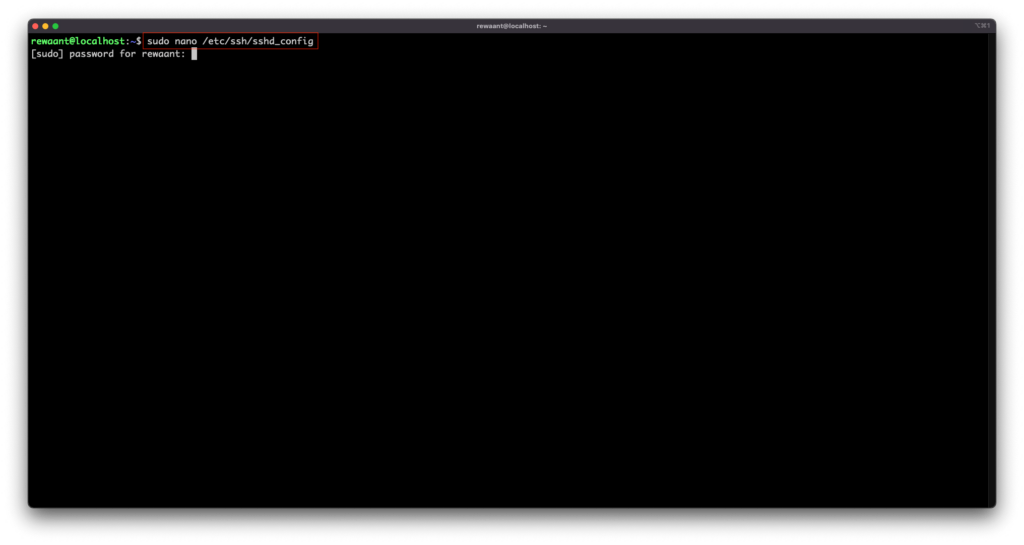
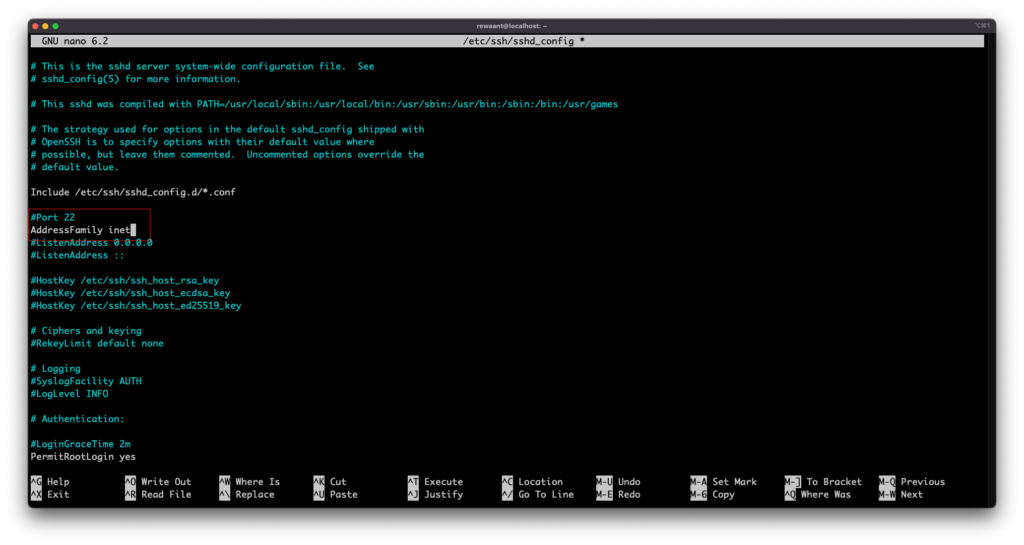
Once connected, type in the command: sudo nano /etc/ssh/sshd_config . This should ask for your user’s password. Once you have access to the file, navigate with the arrow keys to line with the following text:
#Port 22 #AddressFamily any
It’ll most likely be on top of the file with the configuration commented out, make sure this is set to:
#Port 22 AddressFamily inet
This should allow access only over IPv4 connections.
Disable root login via SSH
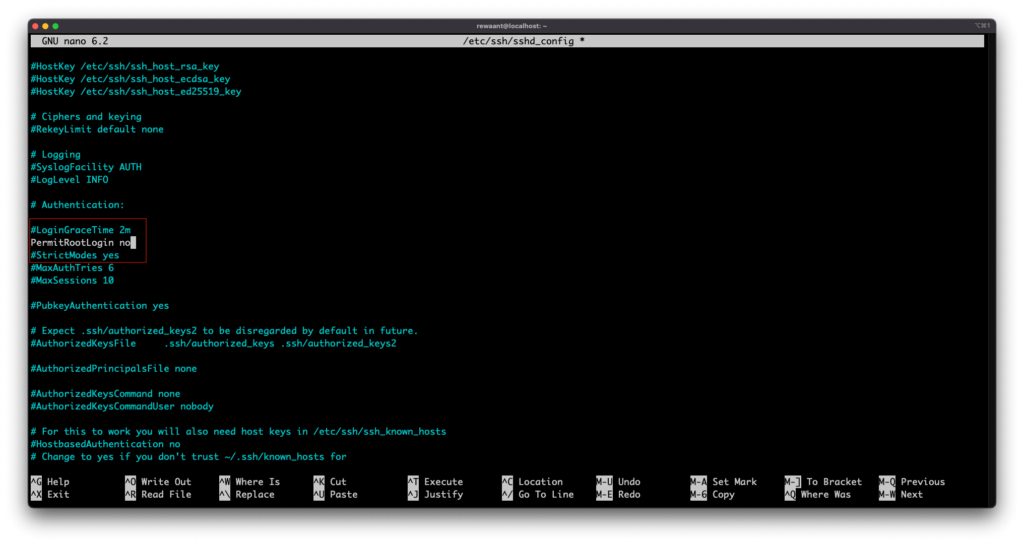
Next, we’ll disable the root user to log in via SSH. “root” is a superuser with the highest administrative privileges that in the wrong/incompetent hands can wreak havoc in the system. Also, most brute-force login attempts target the root user so it’s important to disable this user for SSH entirely. It’s important to make sure that you have a less privileged user already set up on your system with sudo capabilities. You should also know the password to this less privileged user account or you may risk locking yourself out of the system entirely.
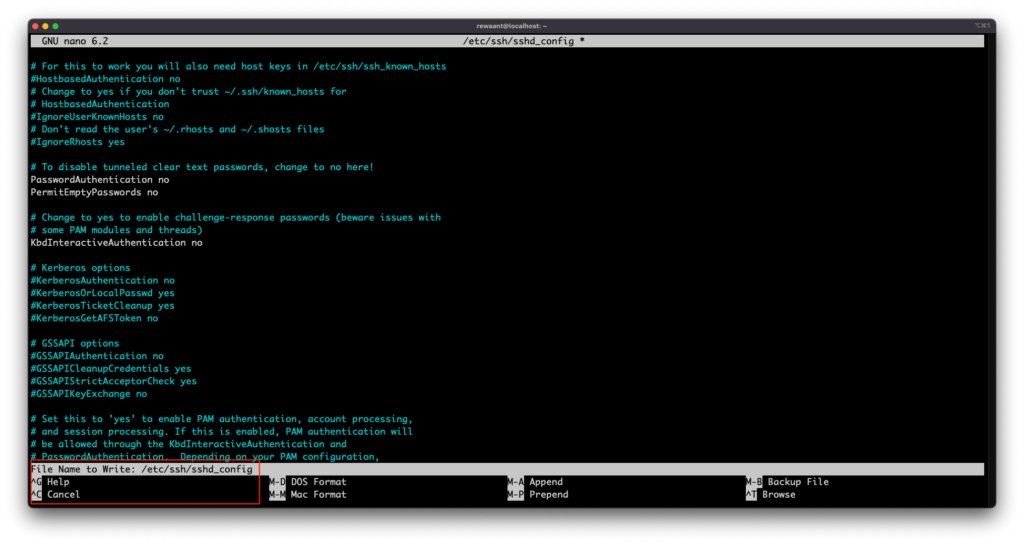
PermitRootLogin yes Change this line to PermitRootLogin no
We now have to write these changes to disk. Assuming you’re using the nano text editor, execute the following commands: Ctrl+O or Cmd+O to write changes to the file. This will confirm the filename, leave it to default, and DO NOT CHANGE. Press Ctrl+X or Cmd+X to exit the nano text editor.
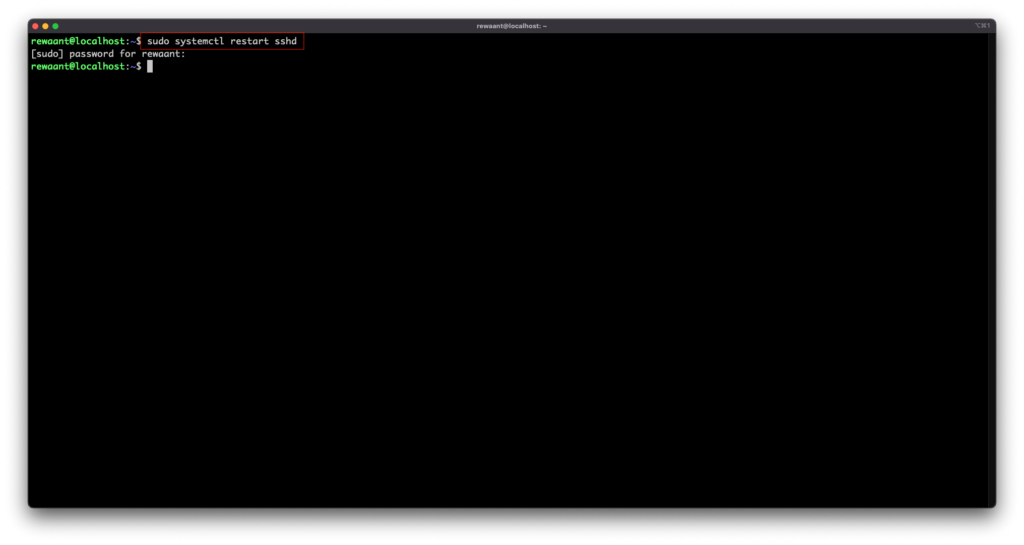
Now we need to restart the SSH service to make these changes active. Execute the command: sudo systemctl restart sshd This will restart the SSH service.
Important: If at any point during or after this tutorial, you get locked out of your system, you can always fall back to using your cloud provider’s web console. They’re handy when things go awry.
Let’s continue to the next section and set up a firewall.
Set up a firewall
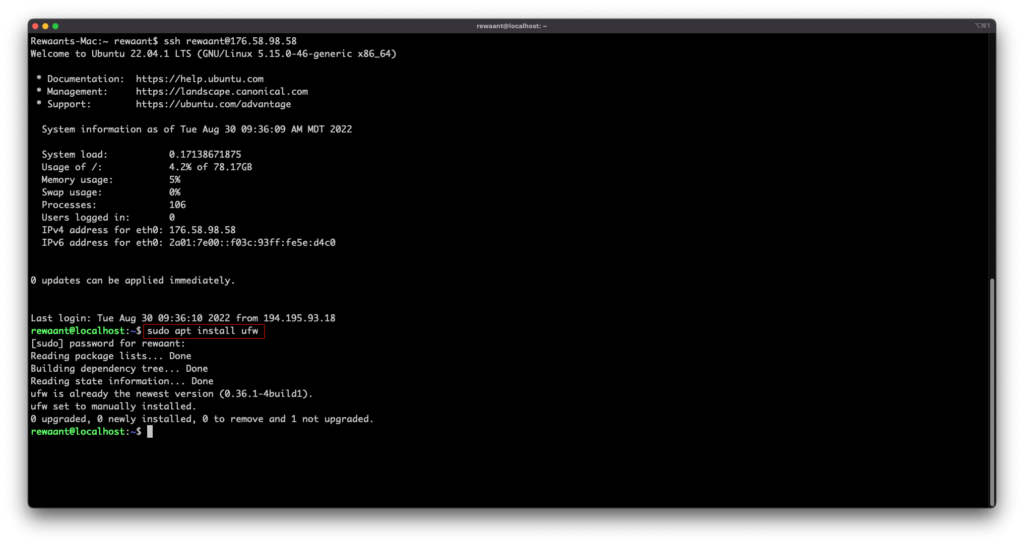
We’ll be using ufw in this guide which stands for Uncomplicated Firewall. This firewall program is simple to set up and more than enough for most use cases out there. To get started, let’s check if we have it pre-installed:
Execute the command: sudo apt install ufw You should see a similar output below.
Once it’s installed, we can enable/disable rules under ufw. For our use case with SSH and opening up the usual HTTP (80) and HTTPS (443) ports, we’ll execute the following commands:
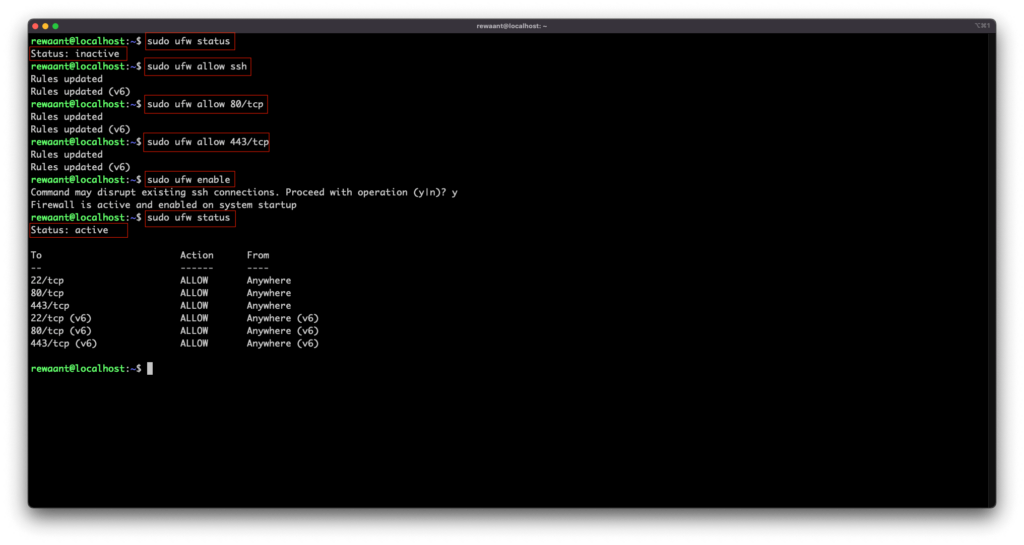
sudo ufw allow sshsudo ufw allow 80/tcpsudo ufw allow 443/tcp
You should see a similar output below.
Now that we’ve allowed the basic ports with firewall, we’ll enable it with the command sudo ufw enable. Do not enable ufw without allowing ssh or port 22 as it’s likely you WILL get locked out of your system.
Check the firewall status with sudo ufw status. This should have similar output with Status: active and the rules printed out below.
We now have the firewall setup, we’ll proceed to the next and final step.
Setting up Fail2Ban
Fail2Ban is another utility that prevents your server from brute-force attacks. It’s likely that authenticated users will be able to access your server with 3 or lesser tries. This utility will ban IP addresses used by hackers and bots which may try to break into our systems using brute-force attacks.
Install Fail2Ban with sudo apt install fail2ban
Enable the fail2ban service with the command sudo systemctl enable fail2ban this will create a systemd service for fail2ban.
We’ll keep the fail2ban configuration to default for simplicity. However, we intend on writing a comprehensive guide for fail2ban later. To start the service, use sudo systemctl start fail2ban.
We’ll now check the service status. Type in sudo systemctl status fail2ban and you should see similar output.

You now have Fail2Ban active and running on your server.
This guide helps you tighten security on your production server by hardening SSH access. Following this guide keeps your resources more secure than most production servers out there. In the end, no matter how many security measures we take it’s always better when solutions are customized specifically to our needs. We recommend you read more on these topics or feel free to reach out to schedule an intro call so we can help you with setting up your sites or app’s infrastructure properly.