Table of Contents
- Overview
- Setting up your VPS
- Updating DNS records to point the domain
- Setting up your server for serving Ghost
- Setting up the publication and going live
Overview
Ghost.org is a modern, open-source CMS and a full-fledged publishing platform used by content creators, news outlets, businesses, bloggers, and professional publishers. There are many CMS options to choose from but one thing that differentiates Ghost from all the other solutions is an exceptional focus on being the most approachable publishing solution.
While you can build almost anything with WordPress, Ghost’s competency as a CMS which is primarily focused on content creation, publishing, and building your audience sets it apart in an ocean of platforms. Other attributes like embracing minimalism while also providing common tools for publishing such as newsletters and membership features out of the box and on top of it being open source gives it a serious edge and we suggest you give them serious consideration if those are your goals. Not to mention, these features may require plugins/extensions and third-party solutions with alternatives.
Another thing to mention is that Ghost is built on top of a modern tech stack using Node.js which makes it fast and snappy as compared to many alternatives. Safe to say your content will be in good hands.
Ghost comes in two flavors:
- Ghost Pro: Think of this as being similar to WordPress.com. We recommend visiting the official pricing page, analyzing your requirements, calculating estimated costs, and reading the FAQs to see if this will be a good option. They don’t offer a free plan but you can sign up with a 14-day free trial. However, we’ll NOT be focusing on this offering in this guide.
- Self-hosting Ghost: Ghost is open source software which means you can use it as a self-hosted publishing platform (just like WordPress.org) on your own server if you want complete control over your publication, have some cost constraints and you plan on using a cost-effective VPS or for any other reason. You lose official support and bear additional responsibilities of managing everything on your own with this option but the official community forums are generally helpful in case you need some help. This also gives you complete control.
In this comprehensive guide, we’ll try to help you set up an Ubuntu production server from scratch, configure an ideal production environment, set things up with your domain, and install Ghost to get started on serving your audience. You can also use DigitalOcean, AWS, GCP, or other cloud platforms as per your preference but the process varies from platform to platform.
Let’s get started.
Setting up your VPS
If you already have a VPS up and running, you can skip to the next section. For simplicity, we’ll be using Linode in our reference material but the principles should apply to other cloud providers as well.
Once you have signed in/up on Linode, you’ll see a screen similar to the one below:
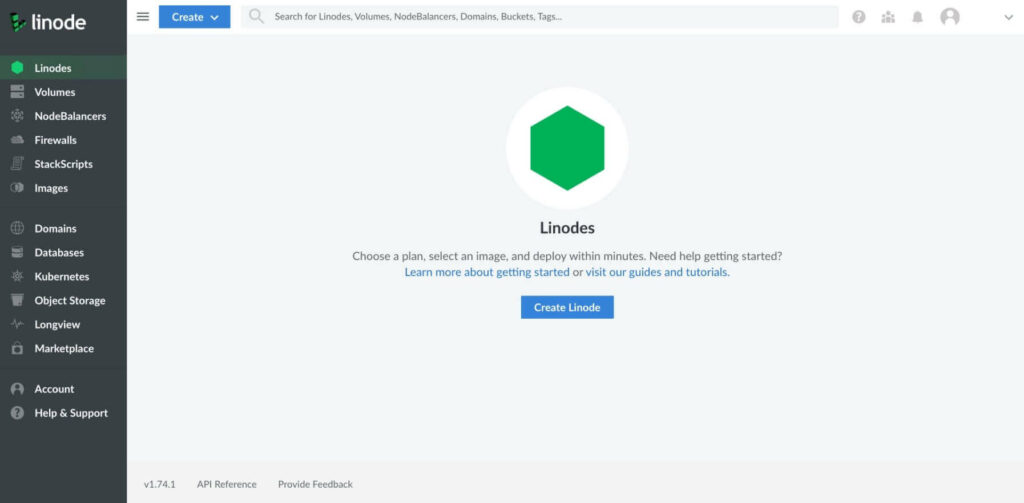
Click on the “Create Linode”. This should take you to a detailed screen where you can customize an instance. We’re using Ubuntu 22.04 LTS as our distribution, for most use cases we recommend you choose Ubuntu’s latest LTS release. The region of choice should be closest to your or your ideal traffic location geographically. We’re setting up a test server so we’ll choose London.
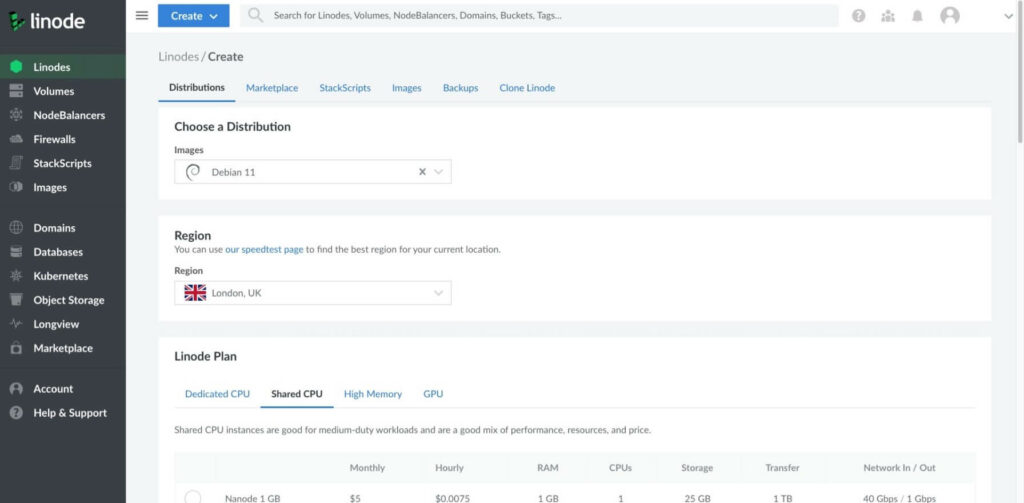
For the plan, we’re selecting “Shared CPU, Linode (4GB)” which goes for $20/month. This should be more than enough for most individual publishers starting out with not much traffic.
The label is just for your reference, set it as per your preference. You can skip the tags for now.
Set a strong root password that you can remember or write it down somewhere. This is very important!
SSH Keys are the recommended way to authenticate and administer your remote servers for multiple reasons. More on this later.
Skip the VLAN section.
We highly recommend choosing a backup plan, can’t count how many times clients have reached out with bad news that their site’s gone (wiped out) and they’re looking for options to somehow retrieve all their lost efforts. Bad for them they didn’t have backups in place.
Backups in Linode are priced according to the plan you choose. In our case, it’s $5/month, for the $5/month instance they go for $2/month. Keep in mind the pricing included here is just for reference and as of the day, it’s last updated. Please check the updated pricing on Linode’s official pricing pages.
You can skip the Private IP section for now.
Review the summary, check the required checkboxes and hit “Create Linode”
You should get a notification that your Linode is being created. Soon, the status should be changed to running and you should see a similar screen. Please note your instance’s IP address and the ssh command as we’ll need them in the next steps to set things up.

Updating DNS records to point the domain
Before setting up the instance, we’ll get the domain part out of the way. In our case, we’ll be using this server for a Ghost publication reachable on a subdomain https://ghost.rewaant.com
We use Cloudflare, adding/updating records for your domain might vary depending on the platform you use for managing the domain’s nameservers.
For the most part, you just need to add an A and a CNAME record for your Ghost publication to be accessible publicly.
Add an A record with the following configuration:
- We’re putting “
ghost“in the Name field. If you’re pointing the apex/root domain to the server, use “@”. If your domain isexample.com, use “@” in the Name field sohttps://example.compoints to your publication. - Put in the IPv4 address of your Ubuntu server. This is the IP address you noted down while creating the Linode instance. This will be your server’s IP address if you already had a server setup and didn’t follow the previous section.
- TTL field should be set to Auto, and hit “Save”.

Add a CNAME record with the following configuration:
- We’re putting in
"www.ghost” in the Name field. If you’re pointing the apex/root domain, use “www“. If your domain isexample.com, use “www” in the Name field sohttps://www.example.compoints to your publication. - We’re putting “
ghost.rewaant.com” in the Target field. We’re doing this because we want all requests for “www.ghost.rewaant.com” to be resolved toghost.rewaant.com. If your domain isexample.comuse “example.com” in the Target field so all requests to “www.example.com” will be resolved to “example.com“. - Hit “Save”.

If this doesn’t work as expected, or you’re trying to set up a different structure, we recommend you follow a domain-specific guide or post your detailed issue directly in the comments section below.
You can now ping your domain to check connectivity. That’s it, we’re good to go to the next step.
Setting up your server for serving Ghost
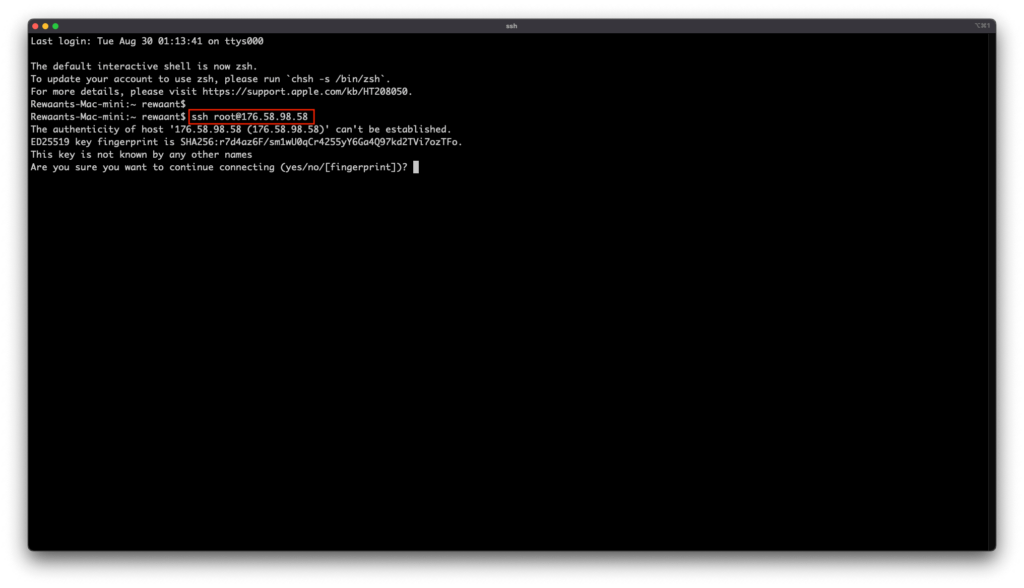
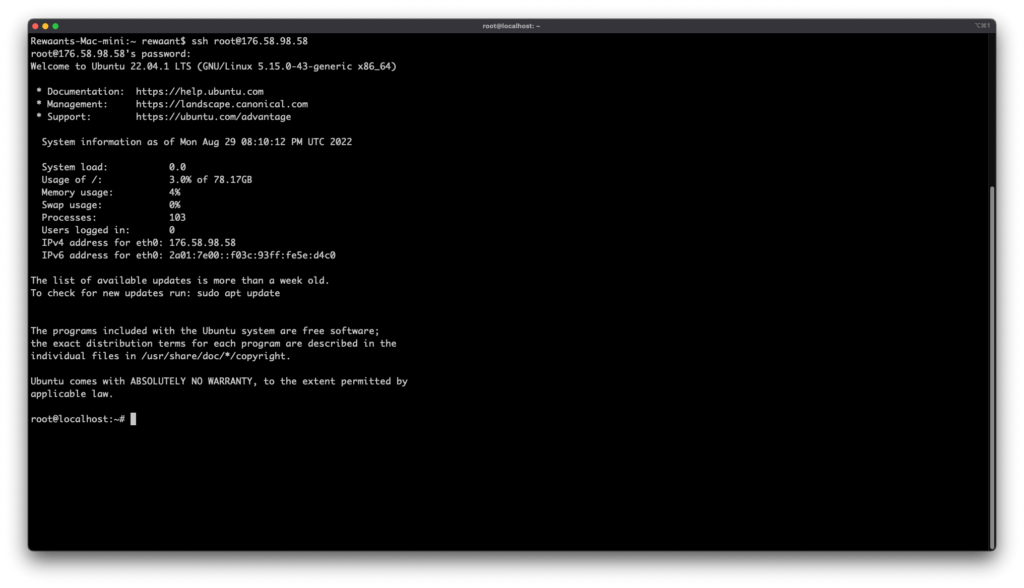
To connect to your VPS, you can either use a web console provided by most cloud providers or a terminal window on your computer. If you’re using Linode, the web console is called LISH console (click “Launch LISH Console”). You can also connect via a local terminal session using the ssh command directly on a terminal window. Important: If you’re using Windows, you’ll need to use a third-party software called Putty to connect to your instance. We’ll post a guide on how to connect to an instance via SSH on Windows using Putty and PuttyGen.
Once connected, you should see a window similar to the one below. Type in “yes” to continue, it’ll then ask for the root password. Type in the root password you set while creating the instance.
We’ll start with performing system updates and securing our server. If you’re setting up a production server, we highly recommend you set up key-based authentication and disable password-based authentication. We also recommend you do this before following the remaining steps of this guide. You can learn more about how to do this by following our concise guide: How to setup SSH keys on your Linux server
To perform updates, type in the following commands:
apt update && apt upgrade → Once you run this command, you’ll see a somewhat similar output. Type in Y to continue. This should take a little while to complete but should upgrade all the packages and libraries.
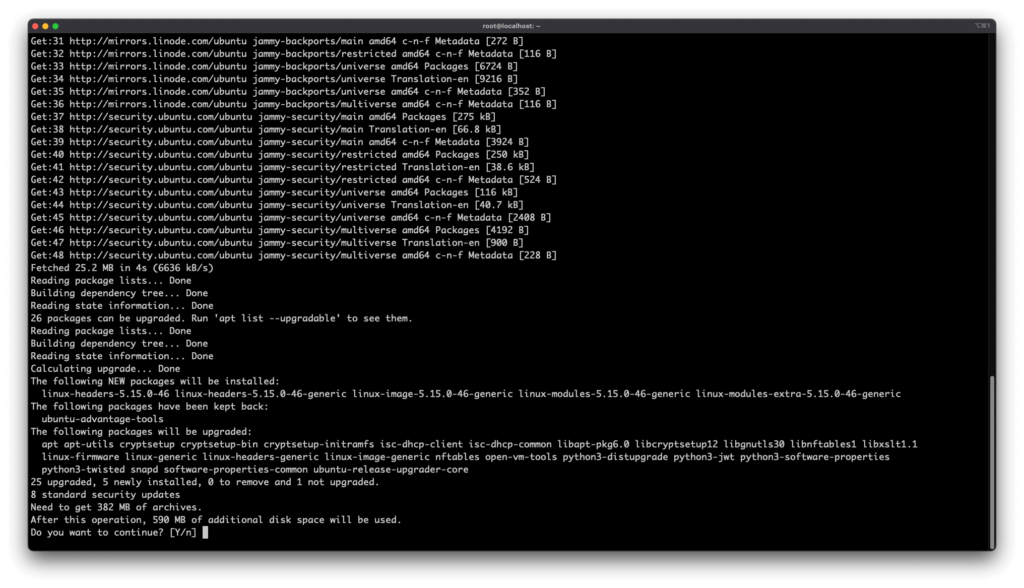
reboot → It’s recommended to reboot after processing updates. Allow a minute or two and reconnect via SSH following steps 1 and 2.
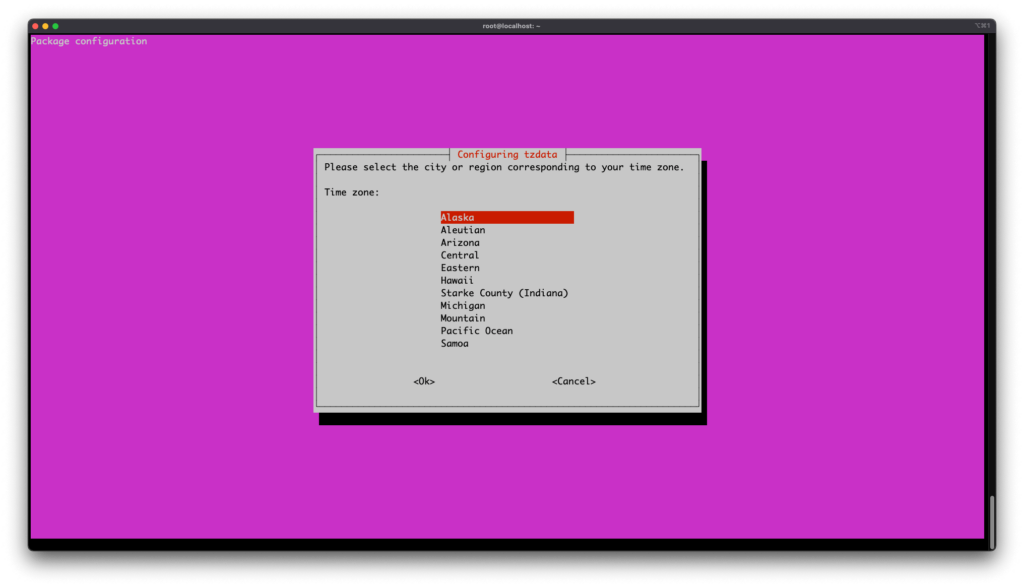
To set up the timezone, type in the following commands:
dpkg-reconfigure tzdata → This should take you to the following screen, Choose the timezone with the up/down arrow & enter keys then use the tab key to navigate and hit “Ok”.

You should now get back to the console.

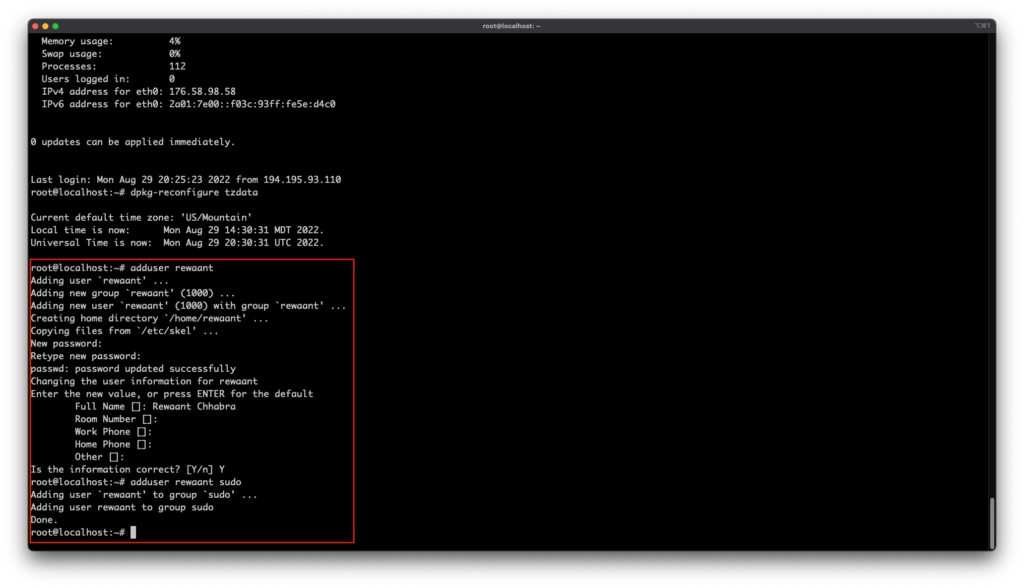
Before proceeding further, we recommend not using root for system administration. It’s highly recommended to set up a new (less privileged) user for server administration. Type in the following commands to add a less privileged user:
adduser *preferred_username* → Type in your username in place of *“preferred_username”*, we’ll be using “rewaant” so the command becomes adduser rewaant. This will now ask for a new password, set a strong password. Type in the Full Name and skip the info for defaults that you don’t want to populate. Type in Y to continue and your new user should be created.
Type in adduser *preferred_username* sudo → Replace *“preferred_username”* with your username. In our case, the command becomes adduser rewaant sudo. This command adds the new user to the sudo group which grants root privileges to the user when prefixed with sudo.
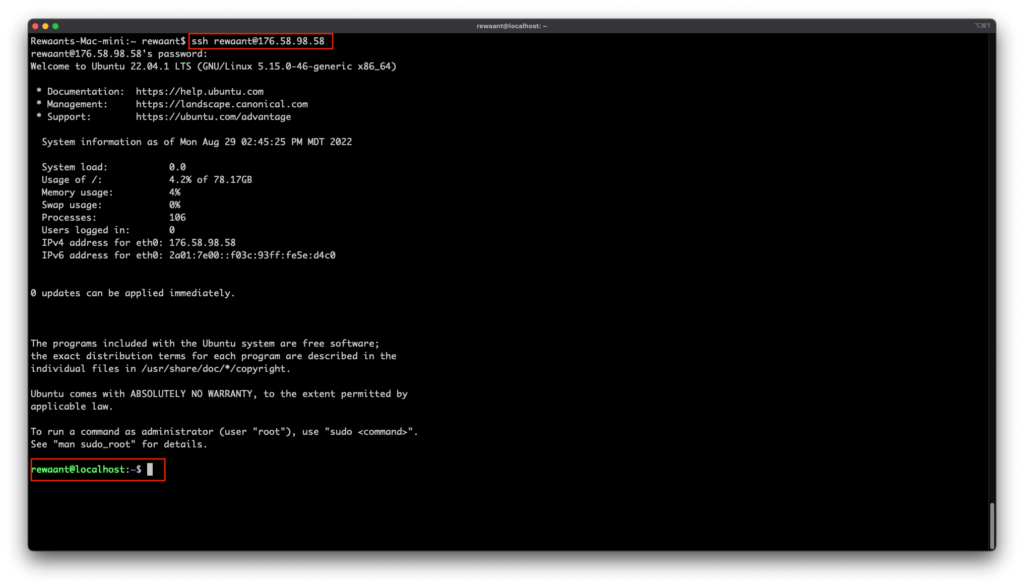
Disconnect and reconnect using the ssh command replacing “root” with the new user. The updated ssh command becomes ssh preferred_username@server_ip_address. In our case, this becomes ssh [email protected]. You should now be able to authenticate with the newly created user.
Next, we’ll harden access through SSH and set up a firewall. Please follow our guide that explains how to do both here: Hardening SSH on your Linux server
Now that we have a server setup, domain pointed, and our server secured, we can proceed to set up the stack and install ghost itself on the server. According to the official Ghost docs, we have the following prerequisites:
- Ubuntu 16.04, Ubuntu 18.04, Ubuntu 20.04 or Ubuntu 22.04 → Check
- NGINX (minimum of 1.9.5 for SSL)
- A supported version of Node.js
- MySQL 8
- Systemd → Check
- A server with at least 1GB memory → Check
- A registered domain name → Check
We’ll start with installing NGINX (Web Server), MySQL (Database Server), and the recent LTS version of Node.js. Execute the following commands:
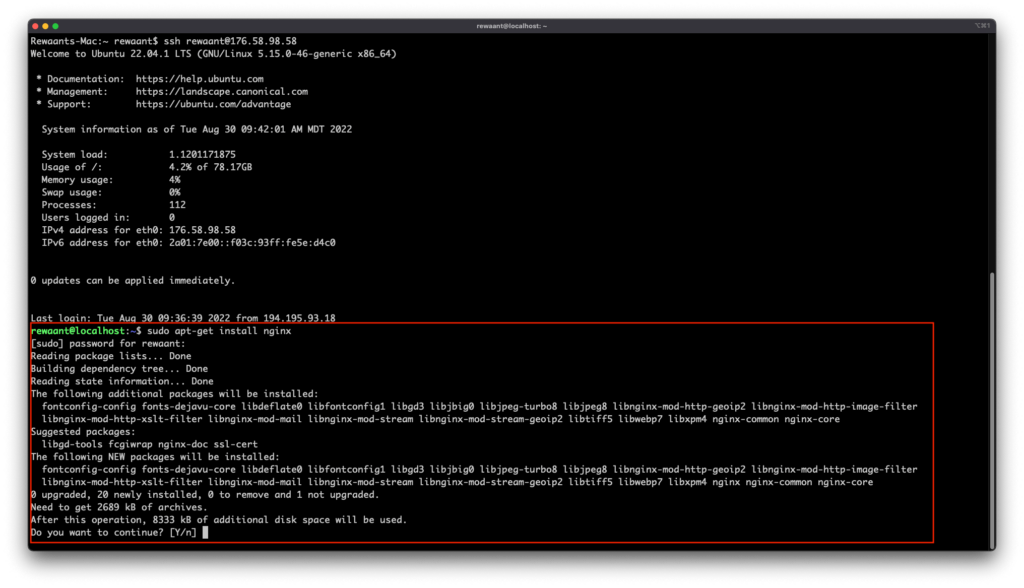
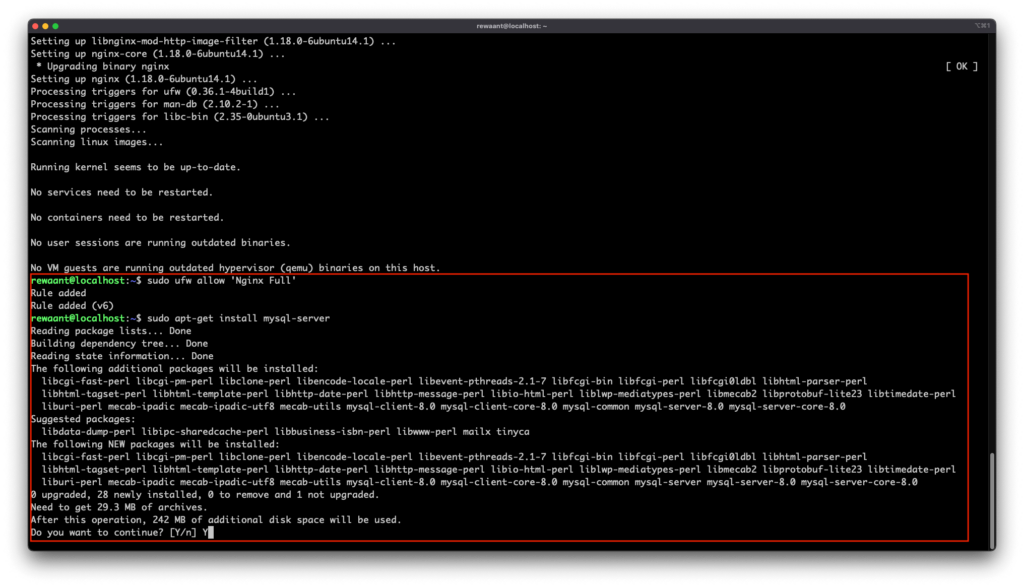
sudo apt-get install nginx → This will install Nginx. Also, make sure to allow ufw for HTTP and HTTPS connection with this command: sudo ufw allow ‘Nginx Full’
sudo apt-get install mysql-server → This will install the MySQL database server.
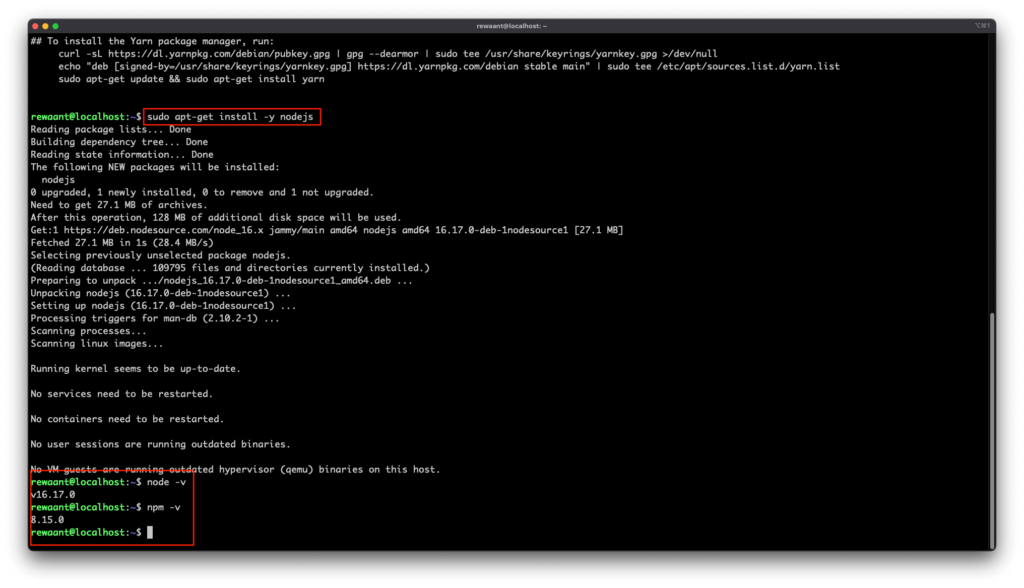
curl -sL https://deb.nodesource.com/setup_16.x | sudo -E bash → This will add the APT repo for Node 16 to the package manager’s sources.
sudo apt-get install -y nodejs → This will install Node.js
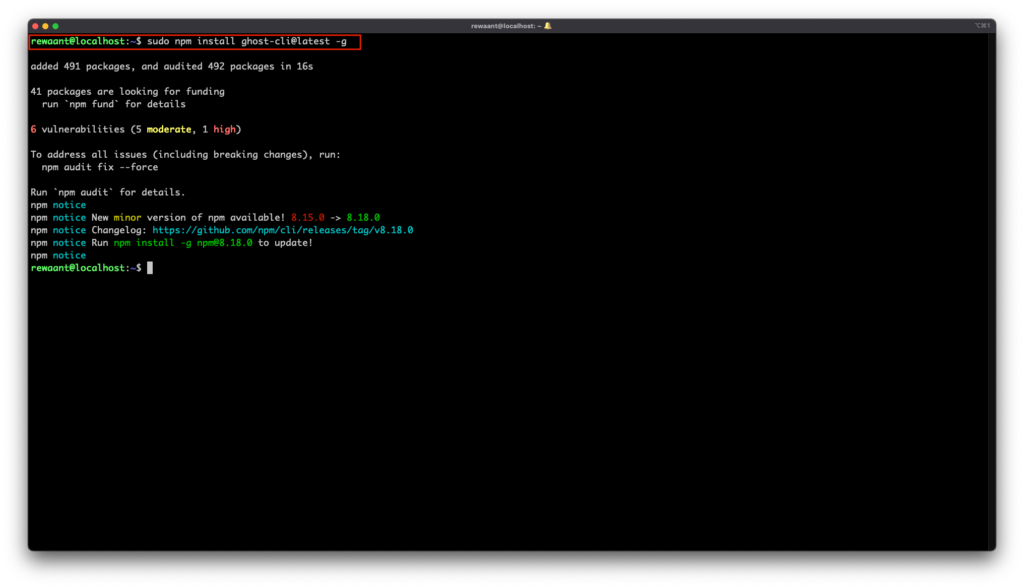
Next, we’ll install the Ghost-CLI which is a command line utility to install and manage Ghost installations. Execute sudo npm install ghost-cli@latest -g → This will install the latest version of ghost-cli globally.
Before we install Ghost, it’s highly recommended that you secure MySQL. We’ll do it with the following commands:
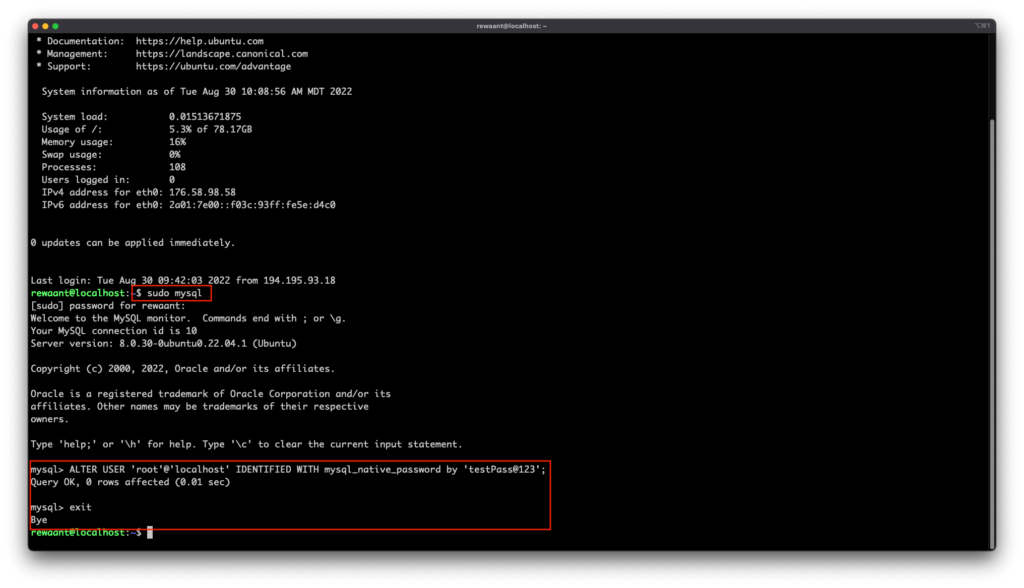
sudo mysql → This will log you in to MySQL as root.
ALTER USER 'root'@'localhost' IDENTIFIED WITH mysql_native_password by *'your_new_password'*; → This will set a root password. Make sure to replace *'your_new_password'* with your password of choice and remember this for future reference or save/write it down.
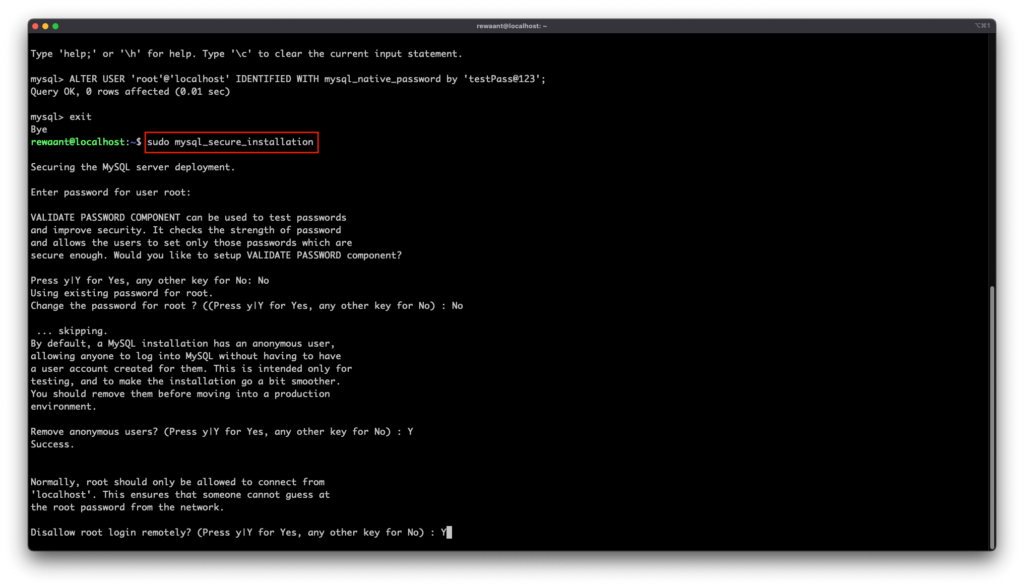
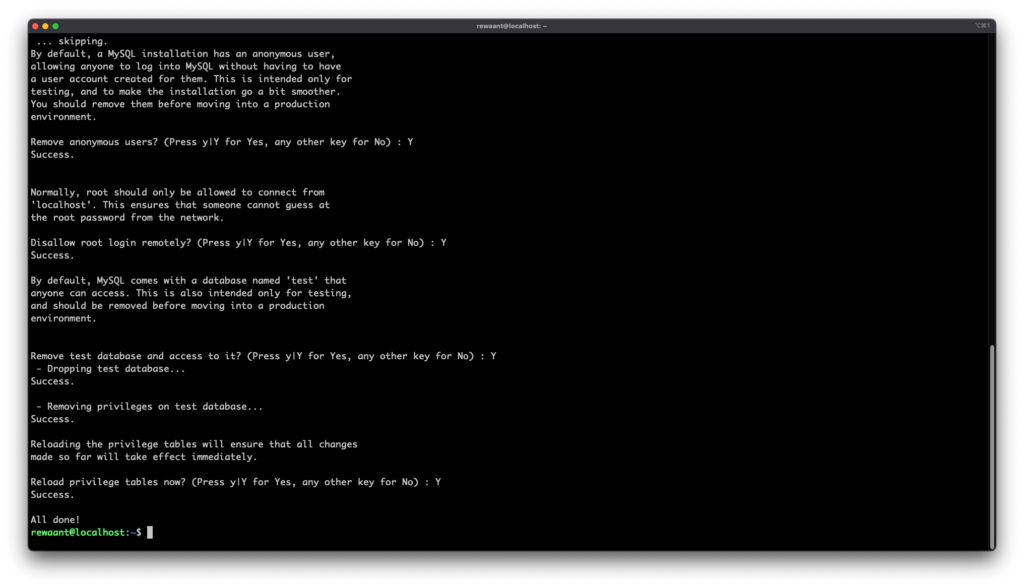
Run sudo mysql_secure_installation. Type in the root password set in the previous step, type in “No” for Validate Password Component, Type in “No” for the prompt to change the root password, type in Y to remove anonymous users, type in Y to disallow root login remotely, type in Y to remove test database, type in Y to reload privilege tables now and hit Return. It should now output an “All done!” message.
We’re now ready to install ghost. Execute the following commands:
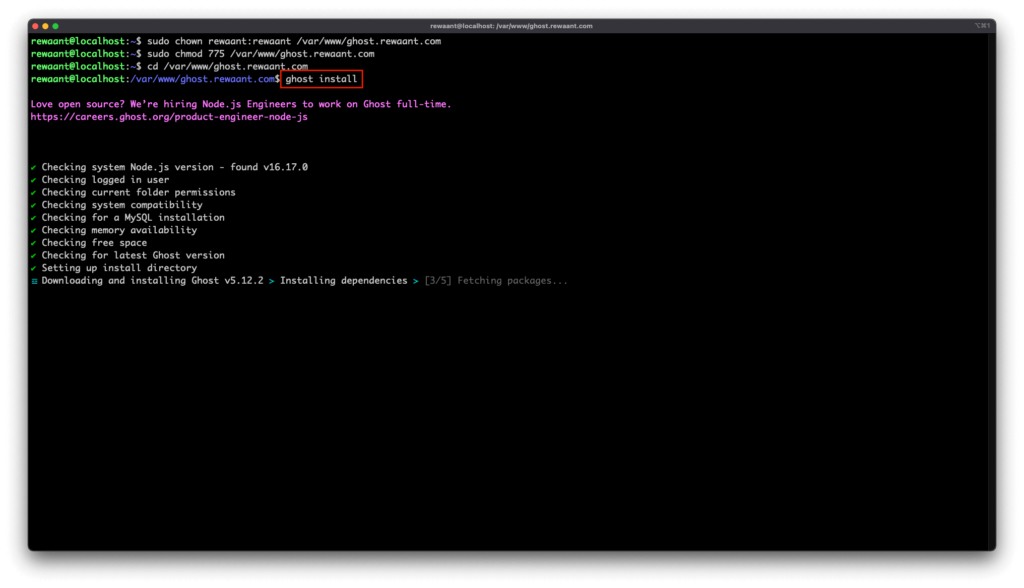
sudo mkdir -p /var/www/*sitename* → Creates a directory to host your site. In our case, this command becomes sudo mkdir -p /var/www/ghost.rewaant.com
sudo chown *<username>*:*<username>* /var/www/*sitename →* Changes the directory owner to our limited user. This helps us run the ghost install script. In our case, this command becomes sudo chown rewaant:rewaant /var/www/ghost.rewaant.com
sudo chmod 775 /var/www/ghost.rewaant.com → Sets the proper directory permissions.
cd /var/www/ghost.rewaant.com → Navigates to the target installation directory.
ghost install → Starts the installation process. It’ll now prompt you for more details:
Blog URL → Type in your blog’s URL. In our case, this becomes https://ghost.rewaant.com
MySQL hostname → Leave this to default (”localhost”) and press return/enter.
MySQL username → Type in root and supply the root password you set earlier.
Ghost database name → Enter a database name, for us we used the default ghost_rewaant_com_prod
Do you wish to set up “ghost” mysql user? → Highly recommended, press Y
Do you wish to setup “Nginx”? → Press Y
Do you wish to setup SSL? → This install LetsEncrypt SSL certificates on your instance. We again recommend doing this. Keep in mind for this to work, your domain records should already be set to point to this server. Press Y Important: If you’re using Cloudflare or your domain service proxies the domain’s IP addresses, this will most likely not work. You’ll have to stop proxying the domain to verify the ownership. Once they’re verified, you can switch them back to being proxied. Please Ignore if your nameservers don’t proxy requests to your domain.
Type in your email if you chose Y in the previous step.
Do you wish to setup Systemd? → Press Y . This will register your ghost publication as a systemd service which automatically starts on reboot. Highly recommended.
Do you want to start Ghost? → Press Y. This should start Ghost and it should be accessible at your chosen URL. In our case https://ghost.rewaant.com
You now have your production server ready. We can disconnect now by typing in exit.

If at any point the setup fails, you can try ghost setup to re-run the configuration process or reinstall with ghost uninstall and ghost install
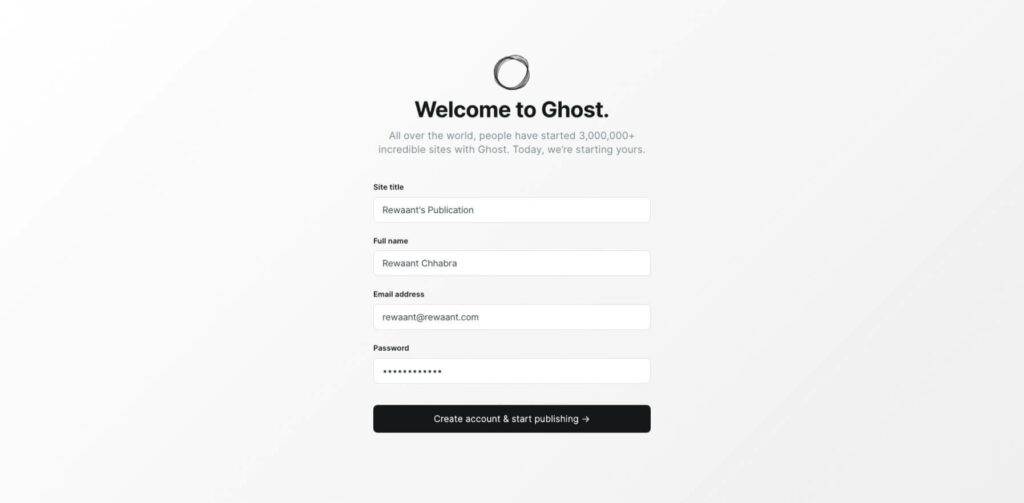
Setting up the publication and going live
To set up the publication, visit https://your_blog_url/ghost. In our case, it’s https://ghost.rewaant.com/ghost
You’re now successfully serving a self-hosted Ghost Publication.