Table of Contents
Overview
SSH stands for “Secure Shell” which is both a protocol and a command line program that lets you administer a remote Linux computer. Here in this guide, we’ll explain setting up key-based SSH authentication for production servers. SSH keys aren’t only more secure than a regular password-based authentication but are convenient at times when you have to manage a number of remote systems.
Getting Started
Let’s get started by first creating an Authentication key pair.
Open up a terminal window on your computer. Create a key pair with the following commands:
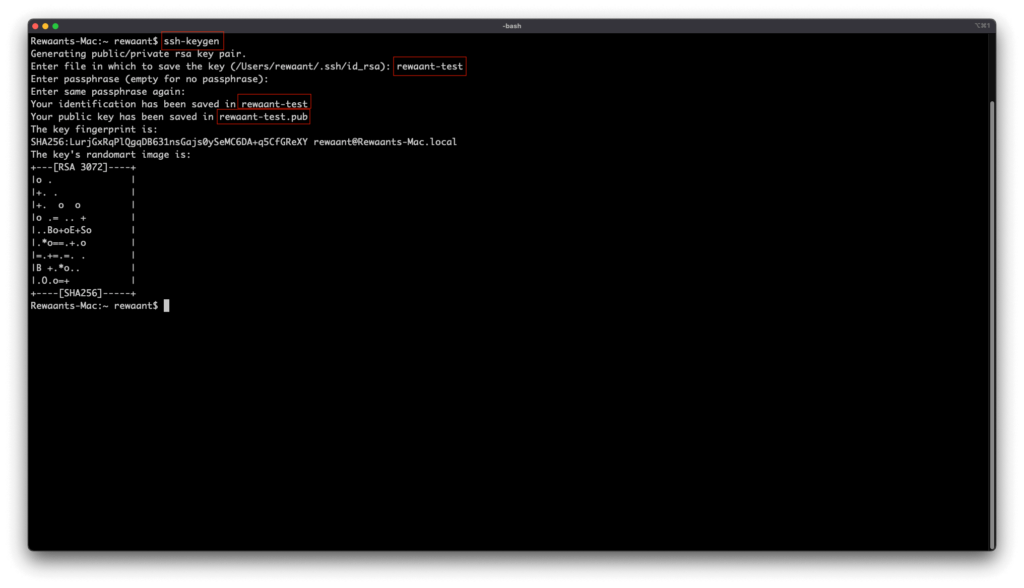
ssh-keygen → Creates a new public/private key pair.
Type in the file names. Here we’ll use rewaant-test
Important: If you already have existing keys with the same name in the directory, this will overwrite their content which may render them useless or worse lock you out of other systems. It’s important to choose a unique name here.
It should now prompt for a passphrase. If you’ll be using this key on a personal/local computer to connect to a single instance and the key files won’t be passed around/shared, you can leave this empty. It’s highly suggested though that you use a passphrase. Whenever you’ll connect to an instance with a passphrase authenticated key, you’ll need to type in the passphrase every single time. Here for the sake of convenience, we’ll leave the passphrase empty.
Your key pair should now be generated. This pair will be saved in either your user’s home directory ~/ or in the /home/your_username/.ssh with the names you selected. The public key file is named with a .pub suffix.
Main Configuration
Next, we’ll have to set up the public key as an “authorized key” to authenticate our logins. We have to upload the public key with specific permissions for the instance’s SSH server to use it for authentication. Follow these steps:
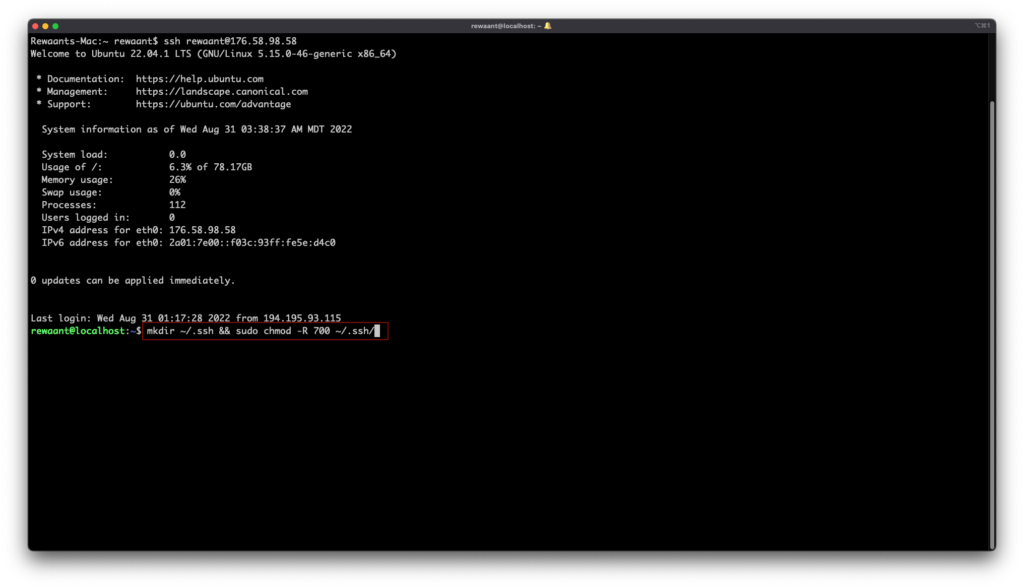
Connect to your instance via SSH.
ssh your_username@your_instance_ip_address which, in our case, becomes ssh [email protected]
Once connected, type in the following commands:
mkdir ~/.ssh && sudo chmod -R 700 ~/.ssh/ → This command creates a directory (.ssh) under the user’s home directory and modifies its permission to 700.
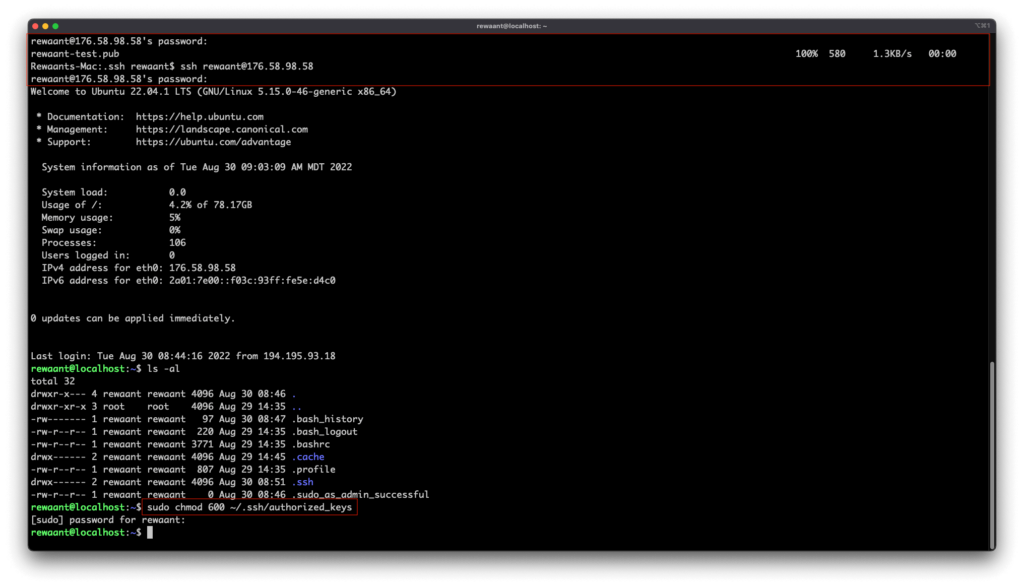
Disconnect and copy the public key to your instance. Use the following commands:
scp ~/.ssh/key_name.pub your_username@your_instance_ip_address:~/.ssh/authorized_keys → SCP is a command line tool used to copy files to a remote computer. This command essentially just copies your public key file to the instance. In our case, this command becomes: scp ~/.ssh/rewaant-test.pub [email protected]:~/.ssh/authorized_keys
It should prompt you for your password, once authenticated it’ll copy the file and take you back to your terminal window.
Now we need to set the proper permission to the authorized keys file. Connect to your instance again, execute sudo chmod 600 ~/.ssh/authorized_keys, disconnect by typing in exit
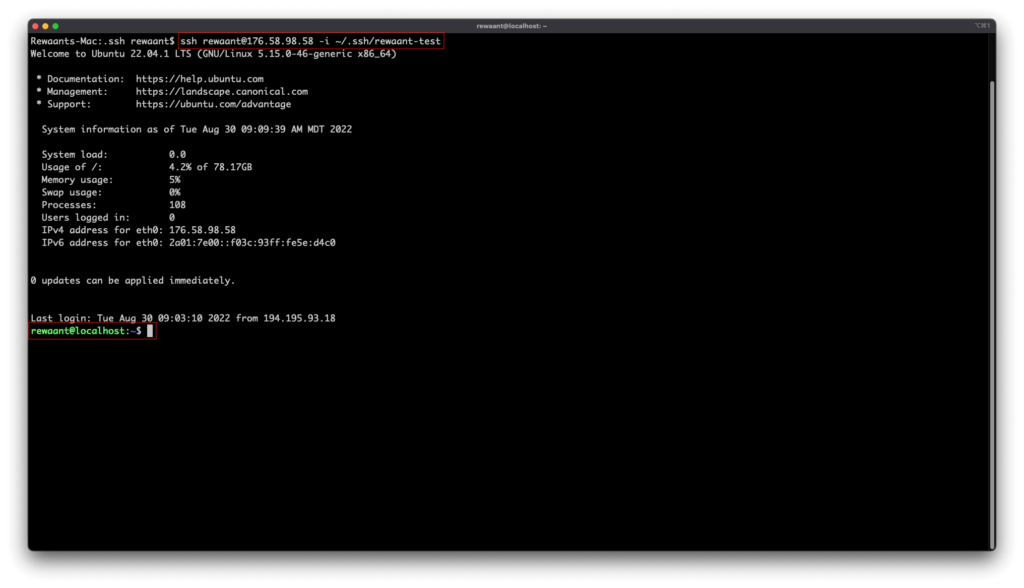
Try reconnecting with the command: ssh your_username@your_instance_ip_address -i ~/.ssh/key_name In our case, this command becomes ssh [email protected] -i ~/.ssh/rewaant-test. Make sure to substitute your public key file path if it’s different from ours.
You should now be able to connect to your instance with the SSH Keys. Keep in mind if you used a passphrase when generating the SSH keys, you’ll be asked for a passphrase to authenticate.
Conclusion
Key-based authentication is much more secure and convenient if you manage multiple systems. We highly recommend using it over passwords in production environments. If you’re setting up a production server, consider reading our guide to Hardening SSH on your production server: Link